How to Create a Denormalized Excel Import Synchronizer
- Open the Synchronize tab
- Create a Microsoft Excel Import Synchronizer
- Open the Mapping
- Click ‘Add Data from Excel’ in the Add tab
- Double click ‘Add Data from Excel’ to select the Excel Spreadsheet
- Use the Microsoft Excel Synchronization Activator Wizard to:
- Select the Denormalized layout;
- Select the data range to cover all the columns you want to import;
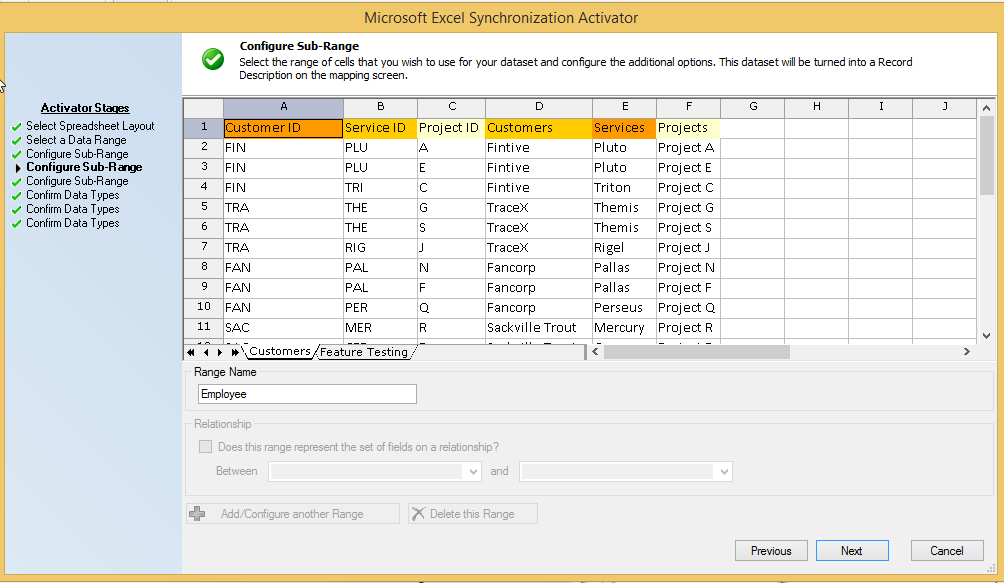
- Select and configure any number of sub-ranges;
- Create any needed Relationship field sub-ranges;
- Confirm the data types.
- Click ‘Finish’ to create the table in the source area
- Add targets to create the target tables
- If prompted, select the container
- Open the Connect tab
- Use the connect tools to map the fields
- Use the field modifiers to alter the field values
- Execute Synchronizer
The short video clip below demonstrates how to create a denormalized SAT:
Select a Data Range
The Denormalized SAT operates within a parent range in the spreadsheet (i.e. not the entire spreadsheet). The first stage sets this data range. You will create your sub-ranges within this range. When you select a range (usually a header row), the wizard scans the range and reports on its success.
Configure the Sub-Range
This stage is repeated for each sub-range you add. A sub-range is made up of any combination of columns from the parent range, including previously used columns. You can create any number of sub-ranges within the parent data range. The order that you create the sub-ranges in is important as each sub-range has a relationship to every subsequent sub-range.
The name given to each sub-range becomes the name of the corresponding table, and is used within the relationships.


Comments
0 comments
Please sign in to leave a comment.